by contributing writer Jackie
Do you use cloth grocery bags? I try to when I go to the store, but I have never had any smaller cloth bags that would work well for produce. Until now, that is.

When my daughter and I were going through her outgrown clothes I noticed a few tank tops and undershirts that I thought would make perfect produce bags.
The sizes of the shirts were 14-16 girls and they made a large produce bag. If you prefer smaller bags you can simply use a smaller shirt.
While I used tank tops and undershirts for the produce bags in this tutorial you can use regular T-shirts and cut the sleeves off before following this tutorial.
If you would like to make your own produce bags that require minimal sewing here’s how.

Supplies Needed
- T-shirt or Tank Top
- Scissors
- Thread
- Sewing Machine
- Ruler
Instructions
1. Turn the T-shirt wrong side out, and pin the bottom together.

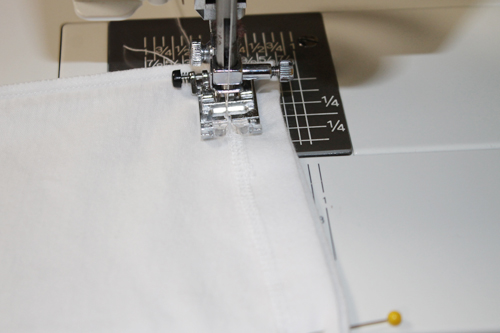
2. Set your sewing machine to a triple stitch so that your seam will be very secure.
The reason for using this stitch is to prevent the seam from busting and you ending up with fruits and veggies everywhere. 🙂

3. Sew the bottom of the T-shirt closed by sewing just to the left of the shirt’s original seam.
4. Now, fold the shirt turning the side of the shirt towards the middle, and make 1/4 inch (or 1/2 inch) cuts every two inches.
This isn’t an exact science. Just be careful not to cut too close to any seams.

5. Once you have made your cuts then you need to refold the shirt so that you can cut another area just like you did.
6. Continue until you have little cuts all over the shirt.

7. Turn the T-shirt right side out and stretch it a little.

You are now ready to fill your T-shirt bag with produce.

The picture below shows the difference between 1/4 inch (pic on the left) cuts and 1/2 inch (pic on the right) cuts.
While I think the 1/2 inch cuts are fine, they won’t work for smaller produce.

If you are a little more ambitious and want to create a rounded bottom to your produce bags simply fold the T-shirt in half lengthwise.
Then, cut it so that it is rounded, like in the picture below, before sewing it together.

Follow the same steps as for the straight bottomed bag.

So, are you ready to ditch the plastic produce bags and switch to cloth?
Then go find some small T-shirts or tank tops. 🙂


Leave a Reply