This week I have been working on purses. I actually wanted to start on some spring dresses for the girls, but then I remembered that I promised my friend a purse.
The purse I made for my friend was made out of a place-mat. It is so easy. You don’t even need a sewing machine to make one. Having machine makes it easier, but it can be done by hand. This is also a very inexpensive gift as I shop for clearance place-mats and make the handles from ribbon, or buy them at JoAnn’s or Michaels with a coupon.
Since so many people asked how I made the tutus, I figured I would just post a picture tutorial for the purse. I hope it is easy to follow, the lighting in my room isn’t so great, but I think you will get the idea.
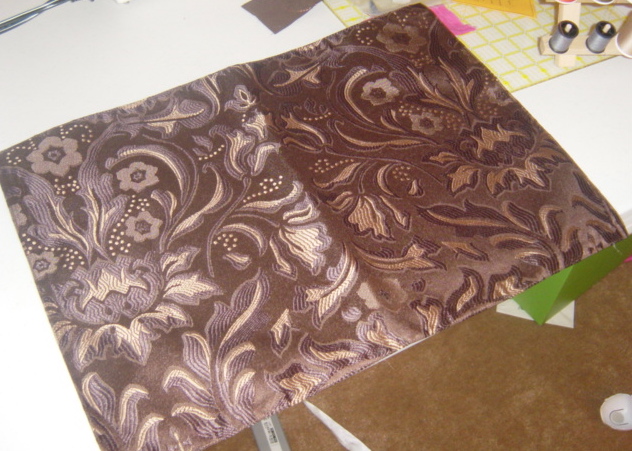
Step one- get a place-mat
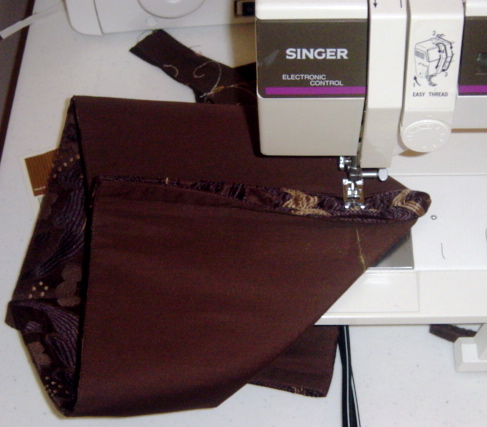
Step two- fold the place mat right sides together and sew up the sides as close to the edge as you can, as a side note, start sewing at the opening of the place mat so you are sure it is lined up correctly
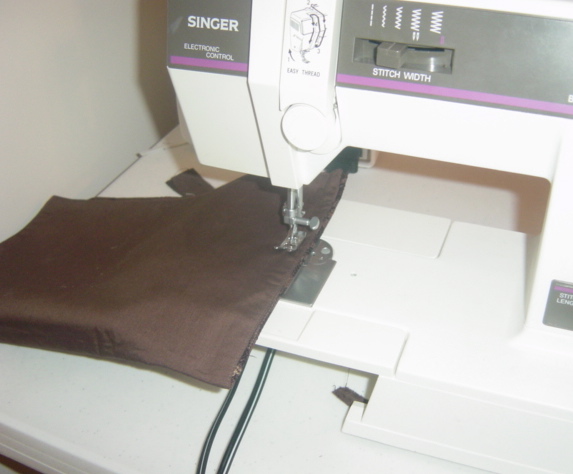
both sides sewn together
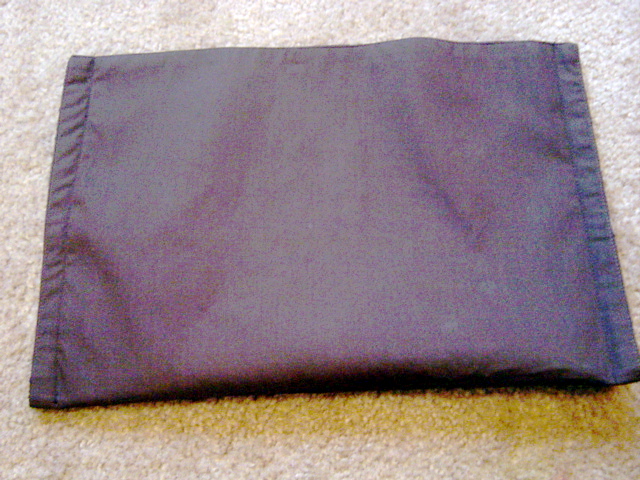
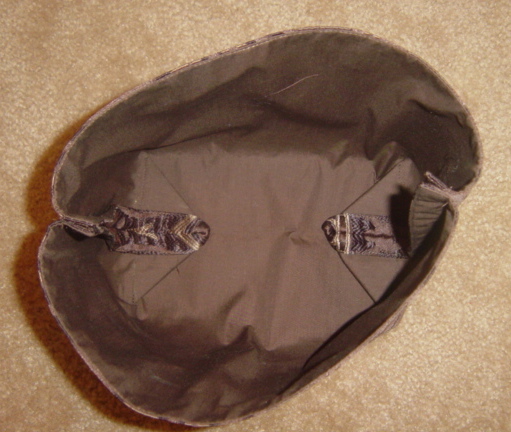
Third step- fold the bottom part of each side of the place-mat into a triangle, measure and mark each side. I usually make the triangle about 2 inches long
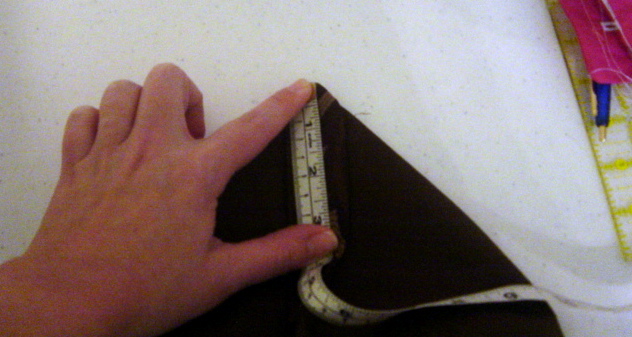
then sew across the triangle
Check both side to make sure they are the same size.
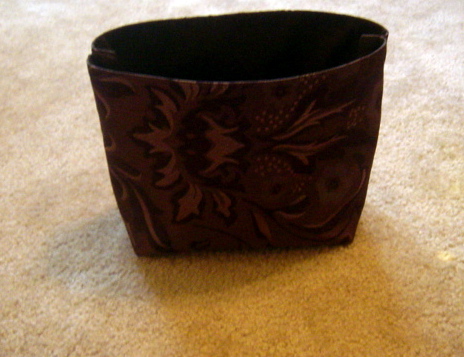
Admire your work so far…
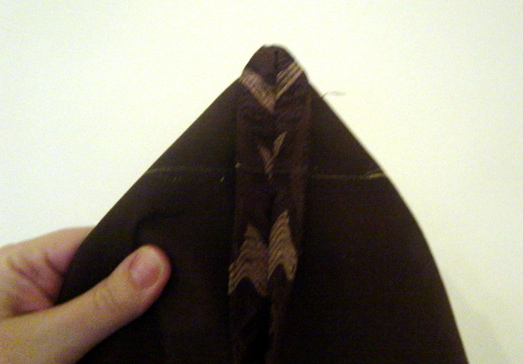
I hope this picture helps show the triangle part a little better.
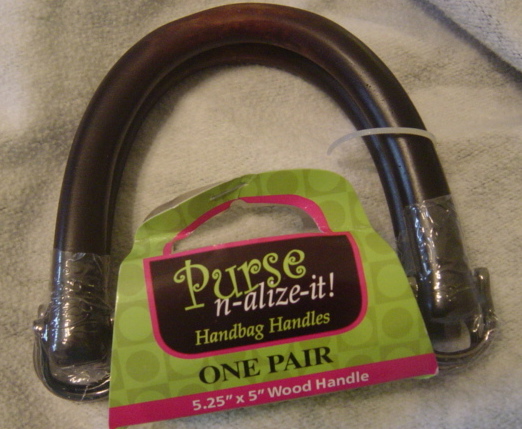
Time to attach the handles, I purchased these at JoAnn’s.
I use quilt binding to attach the handles. It is pretty strong and doesn’t fray.
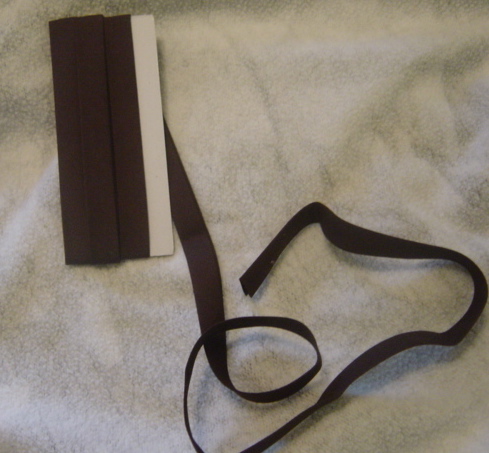
Cut four pieces of binding the same length. Attach each piece to the loop on the handle.

Then attach the handles to the purse. Measure the purse so that the handles line up. Most place-mats have a seam that runs right along the edge of the mat. This a great place to sew your handle on because the stitching for the handle blends in.
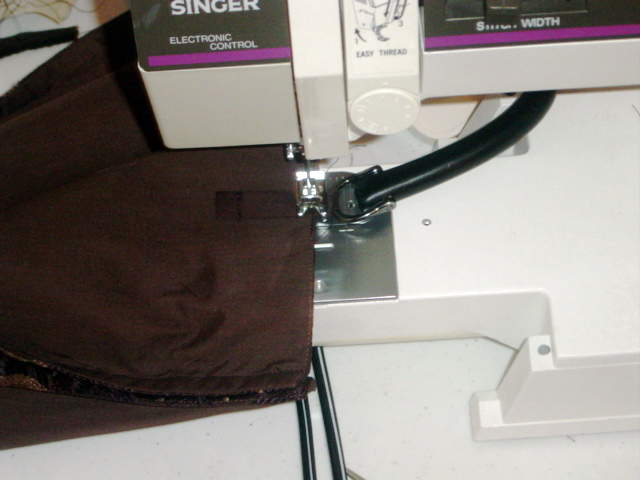
I then tack the bottom part of the binding on the purse for more strength.
All done, your purse is ready to go shopping!
This makes a great gift, and to make it even more special, fill the purse with a book or some pretty cards. Or even better… coupons!
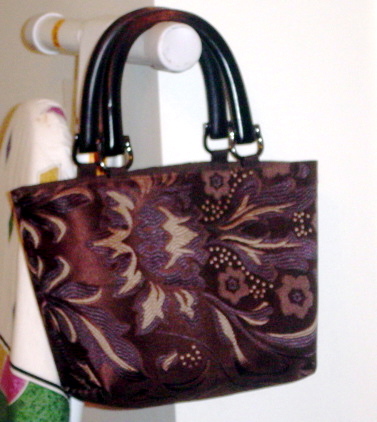
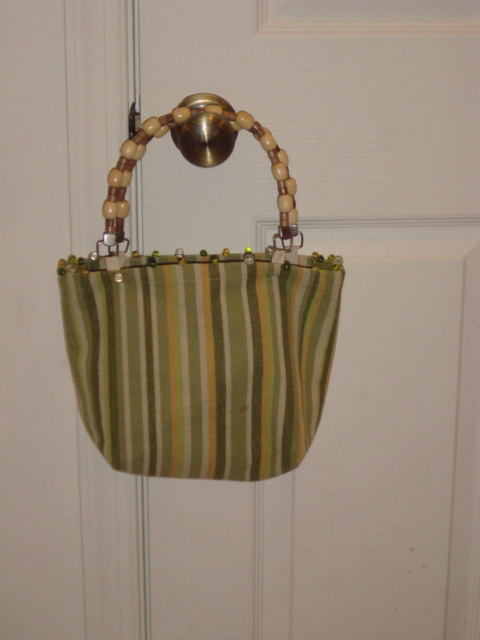
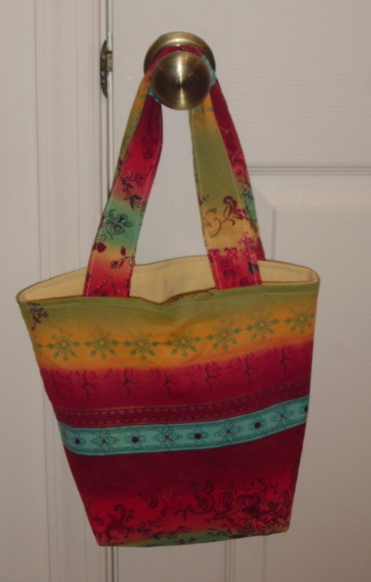
Here are some more of the place-mat purses…
This one was hand sewn by a friend. She used decorative ribbon to attach the handles.

This one looks a little lopsided because I have stuff in it.
Here is a recycled purse. The outside is made from a skirt I bought at the thrift store and the lining was made from a shirt that was husband’s.
class=”MsoNormal”>
You can find more Sew Crafty Friday here


notsosahm says
They look great! I’ve used that set of handles before in the top two bags. Be careful to watch the screws. Mine came loose and one fell out! I have to go get new handles now 🙁 I’m thinking about using clear nail polish or something of that sort to keep the new ones from coming loose.
Beki says
This is great. I was just telling my friend Karen today how to make them. I will just point her to the step by step instructions on the blog! Maybe I’ll even give it a try!
Terri says
That is the cutest idea. I love it!!! My favorite is the first one though. Great job :-)!
Debbie J. says
These are gorgeous! I’ll try those soon I hope!
Kristi says
HI! Your DH just called and directed me here! I am willing to trade my talent for some of your talent!:)
Hugs and kisses to the entire tribe.
mom2fur says
Oh, wow! Great job! I never thought about attaching those kind of handles with quilt binding. You make it look so easy, LOL!
Laurie says
Wow! Those are terrific!
Blessings,
Laurie
Gina says
I was just trying to figure out a birthday gift for mt sister-in-law. Now I know!! Great tutorial.
Oh, and as far as making a dress out of a shirt…you can remove the pocket with a seam ripper. That’s what I did!
Mrs. Decker says
I love these! I have 4 sisters and guess what they will each be getting for their birthdays!!!
snpnmnmi says
How cool are these? I haven’t even considered making a purse since the last big purse fad in the early 80’s… but these are cool! And I don’t even like to carry a purse!
tammy :):):)
momawake says
Great job. Purses are so much fun to make aren’t they!?
Melinda says
I absolutely love it! That is a great gift idea! I want to go out now and buy a placemat and make one. I of course need to make one for myself first to get the hang of making them. : )
Ginny says
Those are absolutely awesome. I have bookmarked this post because you gave excellent directions and this looks like a great project I can do with my 11yo daughter. Have you ever made any with a zipper? Just wondering. I perfer purses that close all the way. I am forever tipping the contents out. LOL Thank-you so much for the inspiration and the directions.
Blessings,
Ginny
Yolanda says
Wow! Those are really nice.
Krista says
After reading your post yesterday, I went last night and bought a placemat at Tuesday Morning and purse handles at Joann’s. I can’t wait to try to sew it together after church tonight. Wish me luck!
Loretta Rizzo says
Thanks! I am pretty sure you just gave my daughter some creative inspiration.
claire says
Thank you for such simple wonderful ideas as making your own purse!
Dineen says
You know what? I have purse handles that have started coming undone from a purse. I think I now have a fix for them. Either I’ll use my stash of quilt binding to see if I can’t fix the purse I love, or repurpose the handles to make a new purse.
Wendy says
In response to Notsosahm…don’t feel you have to replace the handles because the screws came out. I have a bag with those handles and had the same problem – I took it to a shoe repair facility and they replaced just the screw. It was a $2.00 repair on a bag that I love!