• Home
  • Cooking
  • Frugal Living
  • Home Management
  • Homeschooling
  • Real Life

The Happy Housewife™ :: Home Schooling

homeschool tips, printables, curriculum reviews, and more

  • Printables
  • Themes
  • Projects
  • Life
  • Our Curriculum
  • Curriculum Reviews

2 Kid-Friendly Salt and Ice Science Experiments

by Toni Herrbach

The following is a post from contributing writer Marci.

2 Kid Friendly Salt and Ice Science Experiments from The Happy Housewife

Around here, you can tell when there is a threat of winter precipitation. The salt trucks are out in force. They spread salt on overpasses and intersections before anything even starts falling from the skies. We take it for granted that the salt will magically prevent the roads and sidewalks from becoming too slick to drive or walk on safely.  Have you ever really thought of the science behind that magic?

salt truck

The Science Behind Salting Roads and Sidewalks

We know that water freezes at 32 degrees fahrenheit. Salt added to water lowers that temperature. For instance, a 10% salt so

lution lowers the freezing point of water to 20 degrees fahrenheit. Greater solutions lower the freezing point even more.

A common preventative measure is to scatter salt on surfaces before icy conditions occur so that ice doesn’t form. The salt mixes with the precipitation as it falls to form a solution with a lower freezing point than the temperature of the air.

If a surface is already covered with ice, salt can be scattered on the ice. The salt mixes with the thin layer of water on top of the ice and lowers the freezing point. This, in turn, starts to melt the ice below it.

I will point out that salt, NaCl, will only lower the freezing point so far. If the temperature doesn’t get up to the freezing point of the solution, the salt will do no good. In extreme cold situations, a different de-icing agent will have to be used.

Test It Yourself

Let’s do a couple easy experiments to test for ourselves if salt really does affect the freezing point of water.

Experiment #1

Take 2 plastic cups and fill them ⅔ full with water. Add 2 tablespoons of salt to one of the cups and stir. Be sure to mark which cup contains salt. Place both cups in the freezer for 3 or 4 hours. Remove the cups from the freezer. Is there a difference? Are they both frozen?

Experiment #2

Have you ever made homemade ice cream? Did you add rock salt to the ice? Do you know why? In order to freeze the cream, the temperature needs to be less than 32 degrees F. The salt is added to lower the freezing point of water and therefore lower the temperature of the ice.

Try making ice cream in a baggie and test the capability of the salt to lower the temperature of the ice. It’s yummy science!

Homemade Ice Cream

Ingredients

  • ½ cup half and half
  • 1 tablespoon sugar
  • ¼ tsp vanilla
  • ⅓ cup rock salt or table salt
  • 3 cups ice, crushed
  • 1 sandwich size ziploc bag
  • 1 gallon ziploc bag
  • thermometer

Instructions

1. Add the cream, milk, sugar and vanilla to the smaller ziploc bag and seal.

ice cream in a bag

2. Add the 3 cups of ice to the gallon bag. Use the thermometer to measure the temperature of the ice in the bag. Record this temperature.

ice cream salt

3. Pour the salt into the bag of ice.

4. Put the quart bag of ingredients in the gallon bag of ice and seal the gallon bag. Carefully, shake the bags, mixing and cooling the contents. You might want to hold a towel between the bags and your hands. Remember, the temperature of the ice will be decreasing.

ice cream in a bag 4

5. Shake the bags for 5 to 15 minutes, or until the cream becomes firm – ice cream.

ice cream in a bag 3

6. Open the gallon bag and take the temperature of the ice. Record that temperature.

homemade ice cream

7. Scoop your ice cream from the bag and enjoy!

Was there a difference in the temperatures of the ice before and after? What effect did the salt have on the temperature?

More Homeschool Science from Marci

projects-experiments-fun

See all of our Homeschool Projects & Experiments for all ages here!

salt truck photo credit: JMS2 via photopin cc

Comments | Be the first!

Total Yearbooks Review

by Toni Herrbach

The following is a post from contributing writer Tabitha.

Over the past few months, I’ve had the opportunity to try out the Total Yearbooks publishing website. I explored the site thoroughly so I could see all the different options they offered and then ordered several different products. I could truly see the quality of their products.

I have been pleasantly surprised overall and I would like to share what I’ve learned with anyone looking for a place to publish their own yearbooks or similar items.

Total Yearbooks

Website and Uploading

The website is appealing, and all the different options are easy to read and understand. You can view samples, see different pricing options, and get more of an idea of what they do. This is a beta site, however, so you may encounter broken links or things that may not work as intended.

The easiest and best option is to have the pictures/pages/yearbook you want printed already in PDF format and just upload and order. This was not the option I used, but after seeing the great results I received with their normal templates, I can see endless possibilities using PDF pages.

The option I used was to upload my family homeschool pictures and select some of the templates already loaded on their site to arrange them. I used their simple templates and was able to make something truly incredible. However, there are many templates, both free and for an additional cost, to choose from to make your book.

It was easy to do, after I figured out the upload process. This was rather difficult at first but after some trial and error (and patience) it worked out. I’d have to say this was one of the negatives for the site; however, it is still in beta format and it worked very well as soon as I spent some time on it.

pages of the yearbook

Brilliant colors & well bound pages. Lay flat pages are also available.

Options

There are endless options for your book. It isn’t a process where every book looks the same. The only limit to what you can publish is your own imagination. I was able to add captions, edit photos, move photos, change order of pages, change page templates, and many other actions to make our books exactly what I was looking for. I have nothing negative to say about the choice of options.

Ordering

Ordering your book is the same way. Depending on the orientation of your pages, you have many choices for the size of your book, including binding, covers, paper, and print qualities. It is possible to create one book and order it in 10 or more different formats and prices.

When ordering, you can also make your book public or private. Public allows other people to order your book. This is great for a group yearbook or even for a fundraising option. My son has since made an alphabet art book he is offering for sale through the site. Private allows for just you to view and order your book, and there are other options as well for it to be password protected or just available to those have a link. This process wasn’t very easy.  While sharing has some glitches, it is possible.

Prices

I’ve ordered from other publishing companies including Shutterfly and Snapfish, and Total Yearbook pricing is very reasonable, especially considering the options they offer that are far above and beyond what other sites have.  Shipping is also great, with a $1.99 option at a certain purchase level.  Just remember that it won’t be the fastest shipping, and that shipping time is in addition to production time.

Product

Last but not least, the products. My books came fairly quickly and were expertly packaged. The pictures were all clear and looked better than they had in preview versions of the book online. The quality is far above what I expected for the price and I foresee ordering again from Total Yearbooks often!

Full photo wrap hardcover... it looks even better in real life!

Full photo wrap hardcover… it looks even better in real life!

I enjoyed having the opportunity to review their site and products, and while I was provided with site credit, all opinions are my own.

More posts from Tabitha

Comments | 1 comment

Physical Education During the Winter

by Toni Herrbach

The following is a post from contributing writer Tabitha.

You know those days when the kids are climbing the walls? No, I mean literally? There are days when the kids need to stay inside because of extreme low temperatures (please don’t laugh at me, Alaska homeschoolers).

Kids can get lethargic, doing nothing more than watching TV, reading, or sitting at the computer, or playing a video game. While a nice snowy day is perfect for reading or even the occasional movie, this can’t be how we spend our entire winter.

snow fort

Oldest son in a snow fort.

Here are three things that help us get through the winter months and still keep up our physical activity level.

Play outside!

There are so many things to do, snow or no snow. While this isn’t always the best option, depending on health, weather conditions, and location, it still is an option. My kids are dying to go outside right now even though we have 10 degree temperatures because there is that magical white stuff on the ground.

Build forts, shovel, have snowball fights, sled, ice skate, etc. It’s a good time to learn about winter sports (as well as cold weather safety!) and there’s always something to do.

son shoveling driveway

Shoveling snow can be great exercise as well!

Go somewhere!

In some places we’ve lived there have been playgroups, indoor mall walkers, indoor tracks, church ball leagues, even an indoor soccer stadium. This helps us get out and do something physical even if the weather isn’t quiet optimal for outdoor activities.

It doesn’t always have to cost something, but you could sign up for gymnastic or dance classes, or a basketball team. Go to a gym. Another fun option in the winter is an indoor pool.

Stay home!

Going somewhere or playing outside isn’t always an option, and those are usually the worst days to be stuck inside. You may be on your last nerve.  This is when creativity comes into play. Even in a small apartment or house, here are ways to get your children moving:

  • Build a blanket fort
  • Race up the stairs
  • Exercise videos
  • Indoor trampoline
  • Games like Hullabaloo or Twister
  • Jump rope and bikes in the garage (this only works with tricycles or that size with an empty garage!)
  • Stretching
  • Nerf (or similar) ball games
  • Calisthenics (most can be done indoors with a small space!)
  • Play the lava game
Baby girl in snowsuit

Little girl experiencing snow for the first time.

And there are many more! Bad weather doesn’t mean sitting and letting our bodies stiffen in one position over a gaming device, computer, TV, or even a book. We can keep our families physically active even during times of extreme cold.  The above ideas are great for extremely hot weather, too!

More posts from Tabitha

You might also enjoy:

  • 101 Things to do on a Snow Day!

Comments | 1 comment

Winter Worksheets: Free Printables

by Toni Herrbach

The following is a post from contributing writer Lauren. 

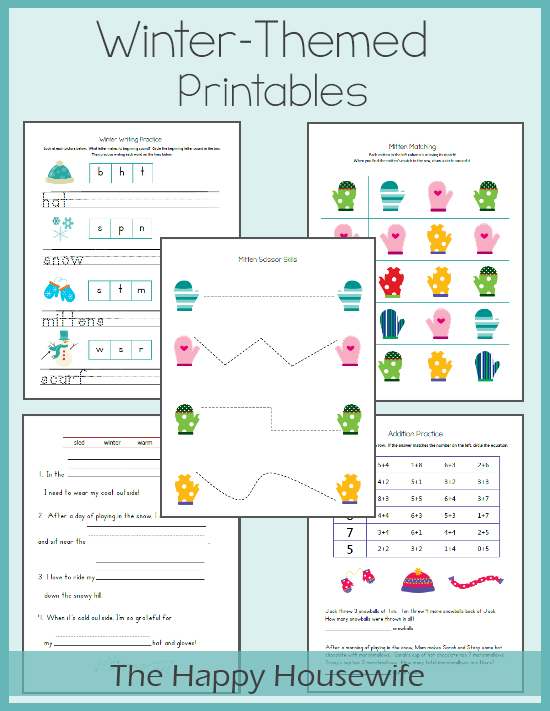
Enjoy this month’s free printables: winter worksheets!  Each of the worksheets in this packet feature a winter theme.  This packet is geared towards Early Kindergarten – First Grade, focusing on beginning sounds, matching, simple fill-in-the-blank, simple addition, and scissor skills.

In this 5-page printable set, you’ll find:

  • Winter Writing Practice – Determine the beginning sound of each picture; includes handwriting practice
  • Mitten Matching – Match each mitten in the left-hand column to its match in the row
  • Winter Fill-in-the-Blank – Fill in the blank with the correct winter-related word
  • Winter Addition Practice – Determine which equations equal the number in the left-hand column; includes simple word problems
  • Mitten Scissor Skills – Match each mitten with its other half
Click the image to download.
January Winter Themed Printables 2013
January Winter Themed Printables 2013.pdf

Platforms:Windows 98, Windows 2000, Windows XP, Windows Vista, Windows 7
License:Freeware
Date:December 20, 2012
765.2 KiB
Details...

Comments | 4 comments

Hands-On Fun with Snow Painting

by Toni Herrbach

The following is a post from contributing writer Colleen.

Snow Painting | The Happy Housewife

 It’s January, and in many places the days are short and cold. Kids want to go outside and play, but the bitterness of winter has set in, so it’s just too frigid to let them out for long.

And homeschooled kids, for whom the activities may have slowed so mom doesn’t have to drive around on slick roads with three or more bundled up balls of energy, cabin fever may be setting in… big time.

Next time you send the kids out to play for the 15 minutes their little bodies can handle, spend the time mixing up some hot chocolate and setting out materials to make sparkly snow pictures.

A warning though – this project can be a bit messy, especially if your kiddos get into it, so make sure you cover up your table {and maybe your floor, too} so the messes are easily contained.

Supplies Needed

  • Paper bowl or plate and a plastic spoon for each child
  • Cheap (dollar store) white shaving cream
  • School glue
  • Glitter
  • Construction paper or cardstock
  • Markers
  • Brushes, sponges, and/or spoons for painting

Instructions

I like to let my little Rembrandts help prepare the “paint” because it’s such messy fun.

  1. Have them mix 1 part glue to 3-4 parts shaving cream with their spoon in the bowl. You’ll have to supervise the amount of shaving cream added. You want it to be fluffy.
  2. If they want some guidelines on where to layer their snow, offer your kids some markers to draw in a scene or a picture. My kids drew snowmen, and planned on adding more detail once the paint dried, but we found it to fluffy to draw on without smooshing it too much, so they ended up leaving it as it was.
  3. Let your artists go to town with their fingers, brushes, spoons, sponges, or whatever you have on hand, and paint their snow picture. Tell them to make sure they layer it on thick and fluffy like snow. My son ended up covering the whole piece of cardstock in different “elevations” to create a snowscape on which to play with his LEGO minifigures.
  4. Give them a chance to add glitter before it dries.

This fun activity can take up a lot of time of your kiddos get into it like mine did. The novelty of the puffy snow paint, and the fluffiness of the finished product should be enticing enough to draw them in for awhile.

Make sure the chocolate is hot, and you have plenty of marshmallows on hand, provide the paint materials, and you’ll have the recipe for a fun, imaginative winter afternoon.

Do you have any great winter afternoon projects to share? Add them to the comments so we can all try them at home with our own kids.

Comments | 1 comment

Goal Setting with Homeschoolers

by Toni Herrbach

The following is a post from contributing writer Stef.

After Christmas we like to sit down and have a discussion with our boys about goal setting.  It is important as a family that we show our children we are setting goals and plan to help keep each other accountable.  We want to show our children that as a family – a team – we need everyone’s help.

If you have yet to make resolutions or goals as a family, you might consider the following ideas:

  • physical improvement – health / wellness
  • mental improvement – education / intellect
  • self-improvement – hobby /sport
  • spiritual improvement – faith

Make sure you are balanced in each area.  If you can only list one goal for each category – only list one.  Children will obviously need some help with ideas. More PE, less Wii, more scripture memorization, less sugary snacks, extra 15 minutes of karate practice daily, reading before television, a new chore chart, etc.

Once you fill each category consider adding a time frame.

  • In the next 30 days I want to …
  • In the next 60 days I want to have …
  • In the next 90 days I want to have …
  • By the end of this year I want to have …

Younger children have a hard time thinking “by the end of the year,” but honestly don’t we all?

Do not allow a time commitment to discourage anyone.

Post your goals in the home.

Plan a special (fun) meal one night each month for discussion and accountability night.  This is the perfect time to show grace and lift one another up!  Goal setting with homeschoolers leads to great discussions, time for encouragement, and also wonderful praise reports!

Therefore encourage one another and build each other up, just as in fact you are doing. 1 Thessalonians 5:11

More posts from Stef

Comments | 1 comment

Real Life Math: Math in the Kitchen

by Toni Herrbach

kitchen math

While math is most often thought about in terms of textbooks and computer programs, one of the most memorable ways for kids to work on math (or any other subject) is through applying their knowledge in a real world experience.  Few spots in your home lend themselves to as much real life math practice as your kitchen.  So, grab your mixing bowl and spoons for some math in the kitchen.

Math in the Kitchen for Young Children

Kitchen math doesn’t have to be used only with older children.  Even very young children can work on math concepts in the kitchen.

working on fractions in the kitchen1. Work on one-to-one correspondence by having them pick out how many items to get if each person at the meal needs one of something (such as a spoon).  A higher skill would to work on needing to give two to each person and so on.

2. Introduce the concept of fractions by having children cut or break things into two pieces, and then label that for them as “halves.”  You can then work on breaking things into fourths.

3. Make simple recipes together, such as a fruit salad, where you can count the items added into it.

4. Number recognition can be worked on with number shaped cookie cutters and a batch of sugar cookie dough.

Math in the Kitchen for Older Children

When children have moved beyond the simplest of kitchen tasks, it can be time to work on other types of kitchen math.

1. Prepare a favorite family recipe (with help).  For more complex math, baking can sometimes be preferable to cooking, as baking usually needs exact measurements.

2. Double or halve a recipe for students working on  fractions.  For their ease (and the safety of the recipe), it would be best to print out the recipe and have your children do all the math to either double or halve the recipe before working on actually preparing the recipe.

3. Work on metric measurements by using a recipe that was written by someone outside of the United States.  Many of those are in metric amounts, which can be great practice for an authentic experience (outside of science) for using metric.  (As a further step, if you are studying a foreign language from a country that uses the metric system, consider working on a recipe in that language.)

4. Practice division and fractions when serving food.  For example, ask children how many pierogies each of the five people in your family can have if there are 15 available.

5. Convert units.  How many pints in a gallon?  How many ounces are in a cup?  These are the types of things that regularly are done on worksheets and then forgotten.  In the kitchen, children will have a hands on chance to work on these concepts.

6. Create a budget.  Budgeting can be an extremely important kitchen skill.  While this doesn’t typically happen right in the kitchen, it greatly affects what goes on in the kitchen.  This is an amazing way to work on money (and food choices) in a very authentic way.

What are some of your favorite ways to work on real world math, even outside of the kitchen?

The following is a post from contributing writer Angie.

Find more Homeschool Math ideas on Pinterest.

You might also like…

  • Free Math Worksheet Printables from Five J’s
  • Learn Math Fast: Curriculum Review
  • Football Math
  • Circus-Themed Math Worksheets: Free Printables
  • Math Worksheets for 2nd Grade: Free Printables

Comments | 2 comments

Tracking Sugar Consumption

by Toni Herrbach

The following is a post from contributing writer Marci.

photo credit: M I S C H E L L E

We’ve been studying nutrition at our house this past month. The kids learned to determine how much of each food group they need to eat at a meal in order to be healthy.  We used the new My Plate USDA guidelines.

My seven year old son was quick to point out that the My Plate guidelines left out his favorite food group – sugar. And since it’s the holiday season, his sweet tooth is on high alert!

This lack of sugar in the recommended daily diet caused us to do some research. Are there any dietary guidelines for sugar? We all know too much sugar isn’t good for us, but…

Just how much sugar is too much?

The average American consumes 22 teaspoons of sugar per day. What?!  This is well above the American Heart Association’s recommendation of no more than 6  to 9 teaspoons of sugar daily. That’s a pretty large gap between what is acceptable and what is the norm.

This made us wonder…How much sugar are we consuming?

I really had no idea. I am known as the “food nazi” around here and don’t buy a lot of sugary or processed food. Even at that, I had a suspicion that my sweet-loving kids were still getting way more sugar than they needed.

Keeping Track of Sugar Consumption

The kids and I decided to keep track of sugar consumption for a day. We simply wrote down everything we ate or drank for an entire day. To determine how much sugar was in our foods we read labels, used an online nutrition tracker such as the Food-O-Meter from WebMD.com, an app like My Fitness Pal, or we just Googled it.

Using labels and nutrition trackers, we figured out grams of sugar consumed. Then, we converted grams into teaspoons. A teaspoon of sugar is 4 grams. So, for instance, if the food contained 16 grams of sugar, we divided 16 by 4 and that’s the teaspoons of sugar — 4.

Our results shocked me. Even with a “food nazi” for a mother, my kids still managed to take in way more sugar than recommended. The culprits?

For my daughter, it was the juice she likes in the morning (25 grams per1 cup) and the sweet bread she loves to eat with sandwiches (10 grams of sugar per roll – she ate 3). That right there was almost 14 tsp of sugar!

For my son, the high sugar culprits were the ovaltine in milk (21 grams of sugar), jelly (12 grams of sugar) and the same sweet bread (10 grams of sugar).

Then, to top the day off, someone bought the kids 2 scoops of ice cream each at a local ice cream shop. Get this —> 51 grams of sugar in those 2 scoops!!! That’s 13 teaspoons of sugar!!

My sugar intake for the day? Just under 3 teaspoons. yes!

Assuming the kids should get less than the 6 gram recommended upper limit of sugar that women should get, they went way over. I was horrified. The kids were not phased by the numbers.

 Making it real

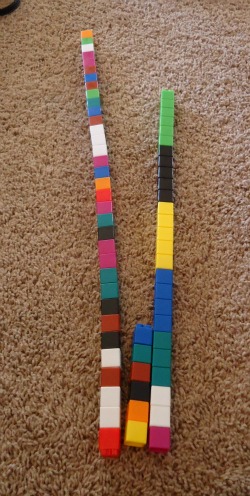
I needed to do something hands-on to get the kids to realize just how much sugar they are consuming. Inspired by SugarStacks.com, I decided we would create our own “sugar” stacks to see just how much sugar we actually ate. Instead of using sugar cubes (I couldn’t find any), we used unifix cubes. One cube = one teaspoon of sugar.

See the little stack of six in the middle? That supposed to be our upper dietary recommendation for sugar consumption. See those huge stacks on each side? Yeah. That how much my kids ate in one day.

Why is too much sugar bad for us?

While our bodies need sugar for energy, studies have shown that too much sugar is not good for our health. From increasing the risk of diabetes, to decreasing cardiovascular health, to the  negative effects of sugar on our brains , the effects of excess sugar consumption can be frightening.

This little exercise made us realize that sugar isn’t just in candy and cookies. It’s in lots of other foods we consume everyday – even foods we think of as “healthy.”

Will this study change my kids eating habits? Maybe a little. My daughter voluntarily gave up her morning juice and decided that the sweet bread should be just for special occasions.  That’s a good start. My son…he’s seven and just wants his ovaltine!!

Will I keep my family from enjoying the sweet pleasures of the season? No. However, I will be watching our sugar from other sources to try and keep it under control. I’m the mom. It’s my job to keep them healthy and teach them how to do the same.

How much sugar do you and your kids consume? Try this simple project and find out!

More Homeschool Science Activities on Pinterest

Comments | 6 comments

Cookie Worksheets: Free Printables

by Toni Herrbach

The following is a post from contributing writer Lauren. 

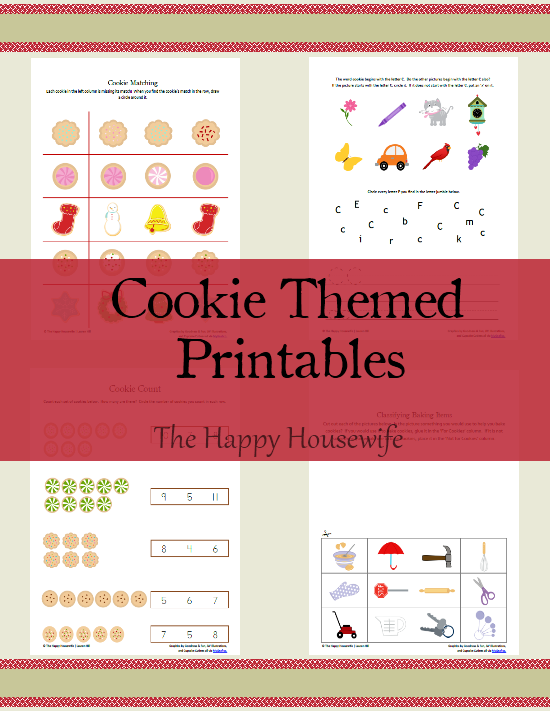
Cookie worksheets are this month’s free printables.  The set is centered around a cookie theme, since December is the perfect month to bake cookies!  These worksheets are geared towards Preschoolers and Kindergarteners, as it requires minimal reading.

In this cookie-themed printable set you’ll find:

  • Cookie Count – Correctly count the number of cookies in each row
  • Cookie Matching – Match the pair of cookies in each row
  • Letter C Practice – Determine which pictures start with the letter c; includes handwriting practice
  • Classifying Baking Items – Determine which items would be needed to bake cookies with this cut & paste activity
Click the image to download.
December Cookie Themed Printables 2012
December Cookie Themed Printables 2012.pdf

Date:November 21, 2012
1.2 MiB
Details...

Comments | 1 comment

Homeschool Cookie Exchange

by Toni Herrbach

The following is a post from contributing writer Stef.

The first thing my kids ask right after Thanksgiving  is, “When can we make Christmas cookies?”  Everyone likes cookies.


Last year we enjoyed getting together with friends to decorate and exchange Christmas cookies.  It was a fun day watching our boys create, have fun, and build on their friendships.

Why not consider planning a homeschool cookie exchange this year!  While kids are waiting for cookies to bake, cool, or just need a bit of a sugar break, it’s a great time to read the Christmas story or watch Why Do We Call it Christmas? by What’s In The Bible.

If your kitchen is too small, consider teaming up with a friend.  They might offer the space, and you could provide the decorating supplies.  You do not have to invite every homeschooler in your county!

Homeschool Cookie Exchange Tips:

  • Encourage moms to bring their premade cookies (or your oven will be on all day long)
  • Provide decorating supplies: sprinkles, frosting, candy, etc.
  • Set out a plastic easy-to-clean tablecloth on a large table
  • Use plastic knives, spoons, and bowls
  • Have more than one trash can handy
  • Wrap Pringles cans or Oatmeal cans with holiday wrapping paper for cookie storage
  •  Play Christmas carols
  • Offer hot chocolate or hot apple cider

It’s important to relax. This isn’t about awarding best cookie decorator!  Offer a fun time for your kid’s friends and a time of sweet fellowship with your friends.

If you have many children consider offering two different cookie exchange days.  Gear one toward the younger kids (who will need more help) and then another for the older kids who can make their own recipes!

Gingerbread Men Photo Credit

Comments | Be the first!

  • « Previous Page
  • 1
  • …
  • 24
  • 25
  • 26
  • 27
  • 28
  • …
  • 38
  • Next Page »

STAY UPDATED!

Get every article delivered to your inbox!

CONNECT WITH ME

  • Facebook
  • Instagram
  • Pinterest
  • Twitter
  • YouTube

Homeschool Projects & Experiments

Homeschool Projects & Experiments

Homeschool Garden Ideas on Pinterest

Recent Posts

  • 101 Things to Do on a Snow Day with Kids
  • Tips for Planning Your Homeschool Day
  • Properties of Water Experiments
  • Sight Word Bingo (Free Printable)
  • Lapbook Ideas
  • Resurrection Eggs with Bible Verses: Easter Craft & Lesson
  • How to Homeschool (even temporarily)

Unbiased Homeschool Reviews!

CONNECT WITH ME

  • Facebook
  • Instagram
  • Pinterest
  • Twitter
  • YouTube

RSS Manage Your Home

CATEGORIES

ARCHIVES

STAY UPDATED!

Get every article delivered to your inbox!

Snow Day Activities for Kids

101 Things to Do on a Snow Day with Kids

By Toni Herrbach 3 Comments

Tips for Planning Your Homeschool Day

By Toni Herrbach 11 Comments

homeschool curriculum reviews

CONNECT WITH ME

  • Facebook
  • Instagram
  • Pinterest
  • Twitter
  • YouTube

Copyright © 2025 · Tasteful theme by Restored 316

Privacy Policy

HOME | CONTACT | ADVERTISING & PR | DISCLOSURE | PRIVACY POLICY

© 2025 – TheHappyHousewife.com. All rights reserved. | Design by Joy @ Five J's Design | Site maintenance by Klong Designs