The following is a post from Jami.
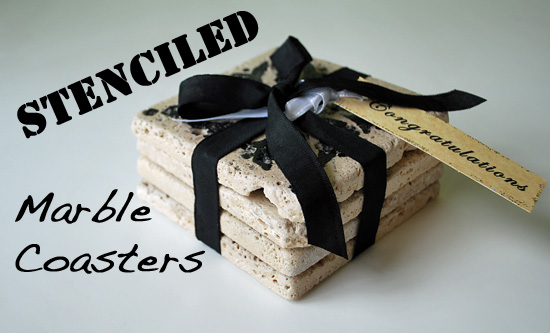
Making stenciled marble coasters has got to be one of the quickest, easiest, and yet most elegant gifts out there. They make an awesome wedding gift and also would be terrific as a hostess gift, a thank you for a friend, or Christmas gifts for your extended family.
And at $0.45 to $0.55 per tile plus the one-time cost of the stencil, a bit of paint and sealer, it’s hard to think of a less expensive gift of this caliber.
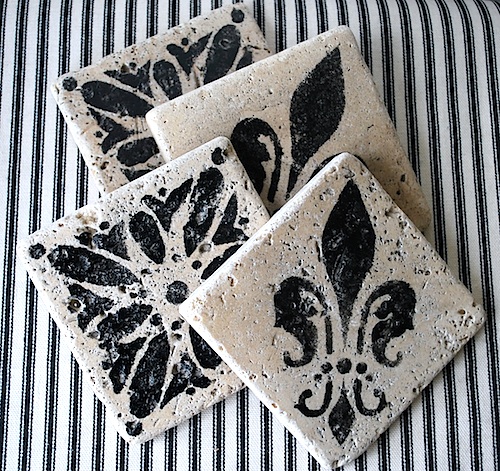
The other nice thing about these is that because they are basically black and white they go with any decor. And using stencils with classic motifs will make these coasters look just as good in a traditional cottage as they would in a mid-century modern house.
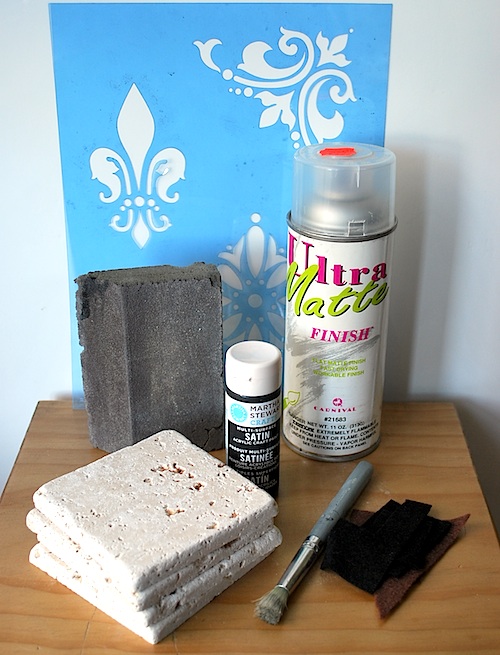
Supplies Needed
- 4 x 4 inch unsealed marble tiles (these are the rough ones, not the smooth type)
- black acrylic paint
- reusable stencil with a design or monogram that fits within the 4 x 4 inch tile (found at craft stores – use a 40%-off coupon for this)
- small stencil brush
- matte or satin clear coat sealer
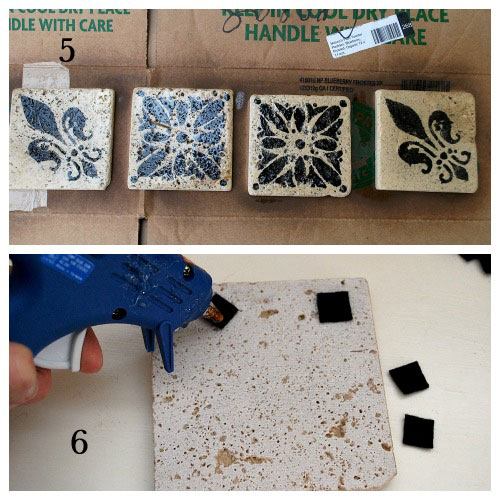
- small pieces of black felt for the coaster bottom (alternately, you can buy self-stick felt pieces for the coaster protectors, OR buy more felt and cover the entire bottom with felt)
- hot glue gun or adhesive to attach felt
Instructions
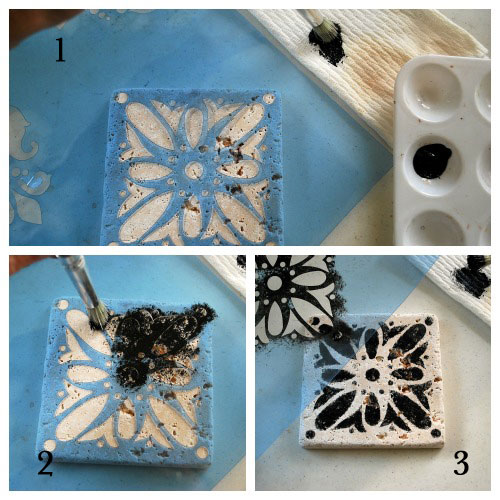
1. Lay the stencil on the tile and dab a bit of paint on the stencil brush. Use a paper towel to blot the brush onto – stenciling is more of a dry-brush technique, so you don’t want a lot of paint on the brush.
2. Using an up-and-down motion, apply the paint to the marble through the stencil. Tapping the brush up and down instead of the typical back-and-forth motion of regular painting helps the paint stay within the edges of the stencil without seeping underneath.
3. Carefully lift the stencil and set the tile aside to dry. Repeat with remaining tiles using the same or different stencils for each tile.
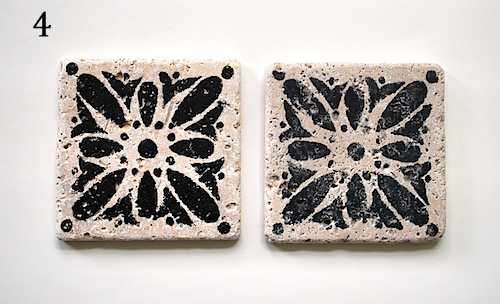
4. After the tiles have dried, an optional step is to sand the surface with a sanding block (or a piece of fine sanding paper). You can see the difference above: the tile on the left has not been sanded, the one on the right has. I prefer the distressed look of the sanded tile and feel it goes with the rough marble, but either way is fine.
5. Spray the tiles with a coat of the clear sealer in your choice of matte or satin. I find one coat is enough for protecting the stencil, but you can add more coats if you wish.
6. Cut small pieces of black felt and use a glue gun to attach to each corner on the back of the tile. Alternately, cut a piece to cover the entire back of the tile and glue into place.
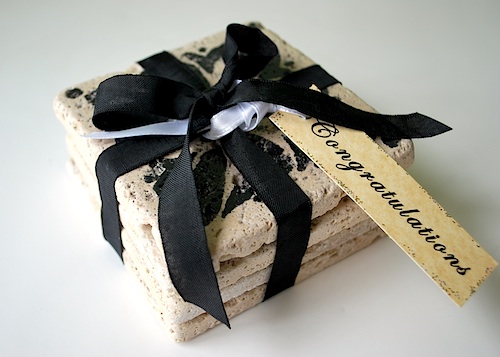
To package for gift-giving, stack the coasters and wrap in black ribbon. Stamp a simple gift tag with the appropriate sentiment – congratulations, thank you, happy birthday, or Merry Christmas – and it’s ready for a bag or a box.
More fun DIY projects:


Carlene says
Where did you find the 4 x 4 inch unsealed marble tiles ? I did a quick search online and can not find a place to buy them at a reasonable price.
Ginger says
Lowes carries them.
Kelly says
I absolutely love this idea and plan to make these for christmas gifts for coworkers. Thanks for a great idea and easy to follow instructions! What a great and helpful post!